|
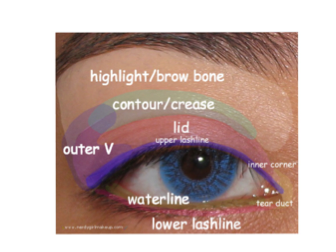
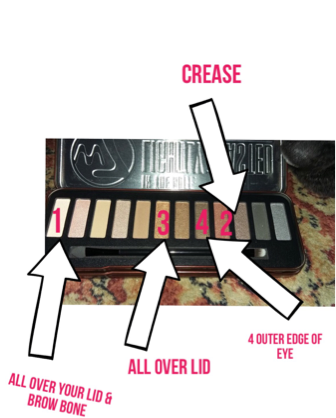
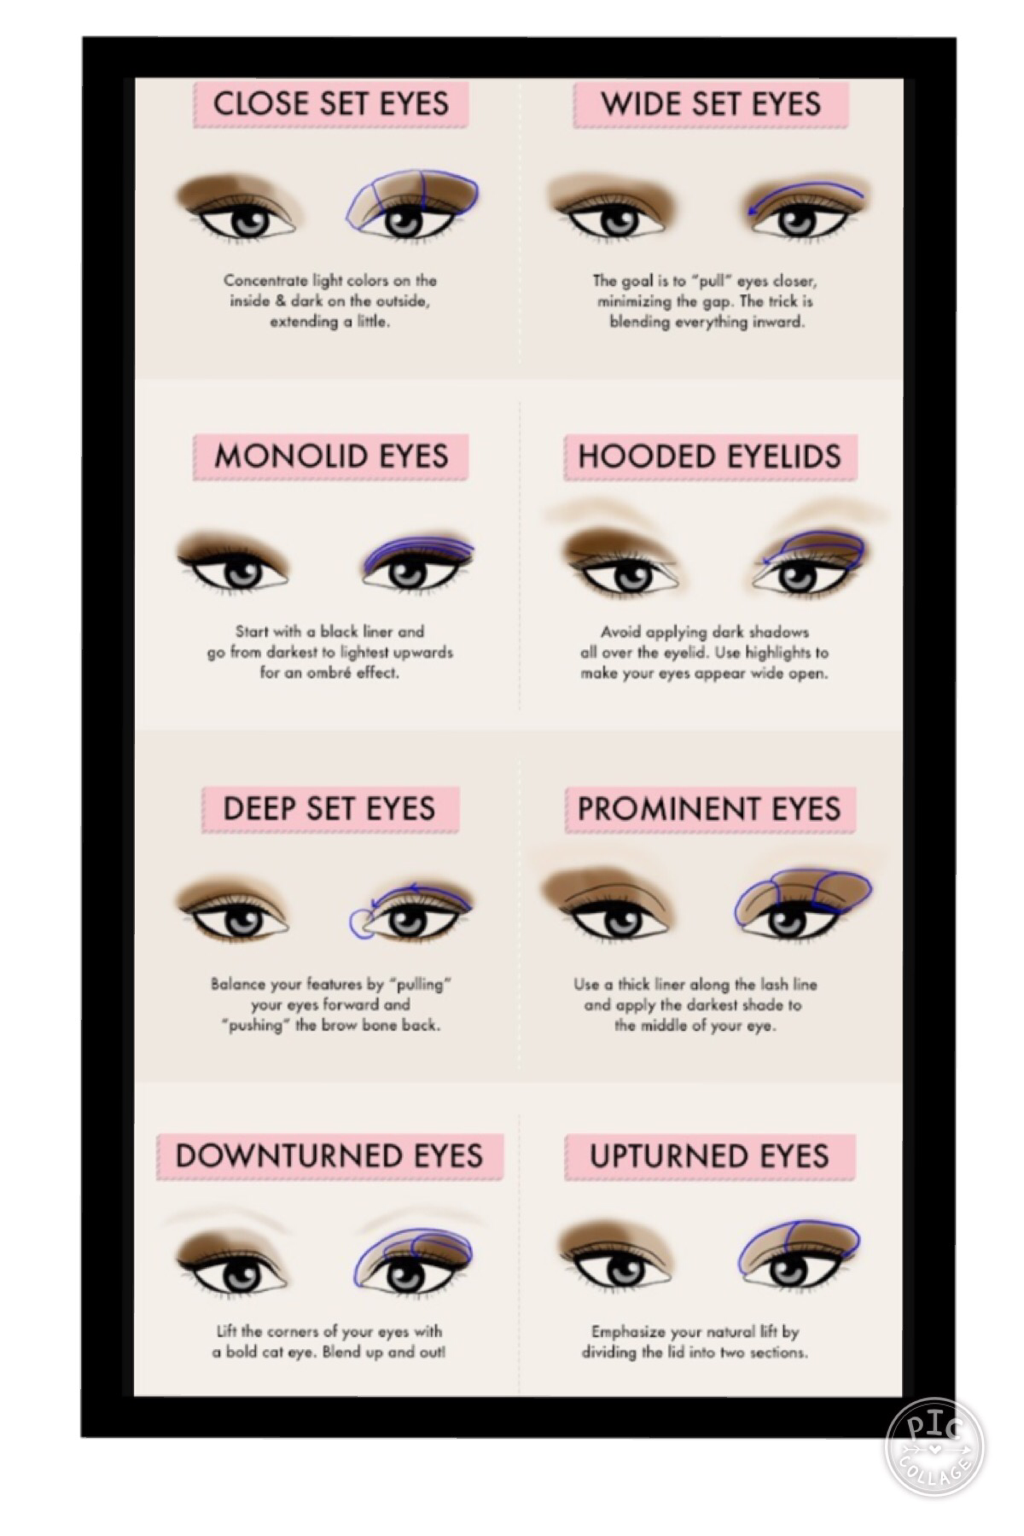
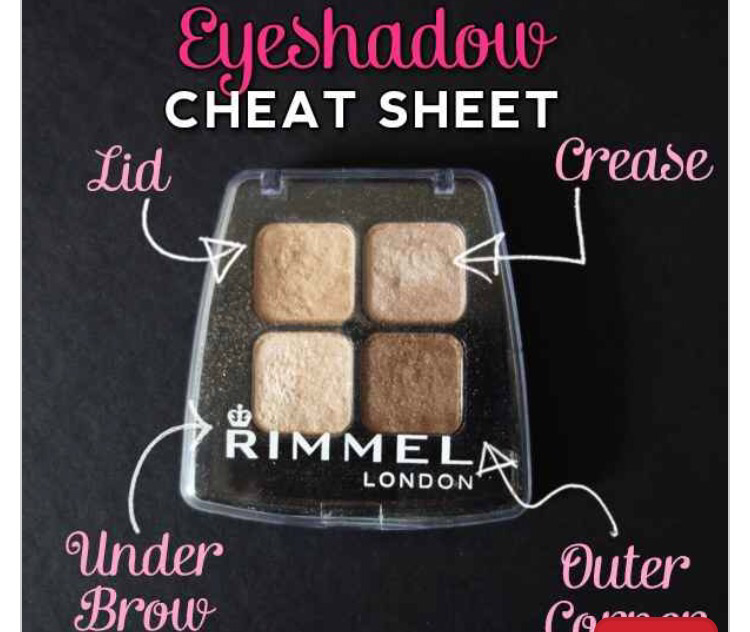
Applying eyeshadow isn't as easy as we think when your starting out it can be challenging at times.A few of you have been asking me about applying eyeshadow so I thought I would do a blog post about it so today I'm taking you all to eyeshadow school. Preparation (1) Know your eye shape this can help determine what shading techniques work best for you I've added a picture below with all of the different eyeshadow shapes. (2) Learn the language yes there is a language for applying eye shadow the key words you need to know are crease,Brow bone, upper lash line, lower lash line,lid and outer v. (3)Learn what all your brushes do this is one of the most important thing that you need to know. (4)choose the eyeshadow formula that works best for what you want Cream eyeshadows -work best as a base colour Loose eyeshadows -are the most pigmented and are tricky to use. Pressed shadows-most common type of shadow available and are extremely easy to blend. (5) Prime priming is something that you don't want to skip it prevents your eyeshadow from creasing and keeps them in place all day. Here's some primers that I would recommend - Inglot eye shadow keeper - smashbox photo finish 24 hour eye primer - Urban decay eyeshadow primer potion primer http://m.debenhams.ie/webapp/wcs/stores/servlet/prod_10052_10001_123932045899_-1 (6)Figure out what shade from your palette goes where for example the lightest shade goes all over your lid and brow bone, darkest colour goes on your outer v. I've added a picture below so you know where to apply it. Application For the application I'm going to use w7 in the buff eyeshadow palette as an example. Make sure you prime your eyelids first. (1) select the lightest shade from the palette I have it labeled as 1 in the picture but the name of the shade is "buff" put it all over your eyelid in dabbing motions this makes the shadow more pigmented apply it to your brow bone too. (2) practice your blending by taking the second shade labelled in the picture below and place this all over your lid. (3) take the shade labeled 3 and apply it to your crease and blend it really out to remove any harsh lines. (4) next take the darkest shade but if you want to create a defined shape I suggest that you use tape by place it at the corner of your eye then take the darkest shade and really blend it out and then remove the tape. (5) apply eyeliner and mascara to complete the look you can add some shadow on your lower lash line just to smoke it out. There you have it a natural smokey eye here's a little tip * if you make any mistakes remove it with concealer or coconut oil* it removes it straight away. I hope you enjoyed this blog post and I hope you all had a lovely Christmas and if you guys have any more ideas don't be afraid to message message me. I hope this is useful to you guys. Until next time bees, Queen Bee
3 Comments
28/3/2020 04:10:34 am
Before you begin with the eyeshadow class, make sure that you have a good brand of eye shadow. At the same time, make sure that you have a wide selection of colors so the exploration process wouldn’t be limited. I know that it is really hard to learn, but I am looking forward to be part of it, especially now that my friends told me that a right eyeshadow gives more personality to me. I guess, I should follow their advices because that’s going to be for my own good!
Reply
16/11/2022 01:06:31 pm
Do you want to order an essay? Go to the order form on the main page of the EssayMarket. It won't take you long to fill it out.
Reply
Leave a Reply. |
Archives
April 2021
|



 RSS Feed